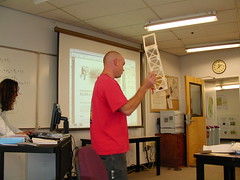
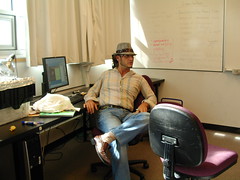
Lonny was honored to present to the Humboldt State University Business Partners Steering Committee Meeting. He presented on his service learning based, engineering courses as well as leveraging Appropedia. The presentation highlights many Engineering 215 projects.
The HSU Engr215 Rube Goldberg Inventions demonstrations of Fall 2009 were a great success. We had a variety of celebrity judges including teachers (thank you Dustin Poppendieck and Jessie Misha Cretser-Hartenstein), past students and a 9 year old (his birthday was last week).
Here are some of the Rube Goldberg photos:
[flickr tag=rgf09 num=20 size=Thumbnail ]
All of the projects went great, with each team completing the task within the allotted time while impressing the audience with their Rube Goldberg spirit!
Here is a video of an effective can crushing Rube Goldberg invention from the appropriately named Team SMASH!
Here is a congratulatory slide-show (download to see the animations):
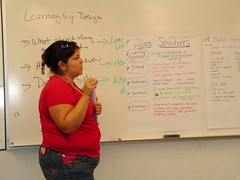
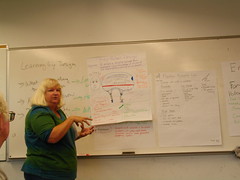
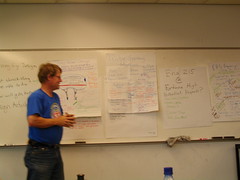
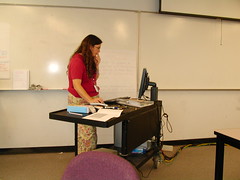
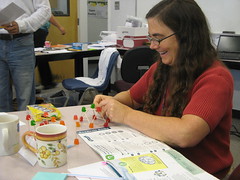
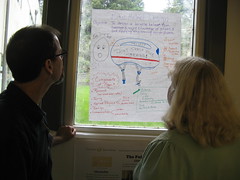
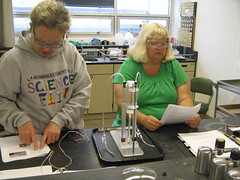
Maggie presents what she gained from talking with the engineers.
Maggie’s project is to have students develop structures that demonstrate multiple slopes using manila folders with graph paper on them. Engineers provided ideas about unit conversions, volume calculations, surface area calculations. Folks talked about helping Hoopa Elementary students to learn about local projects from engineers. In addition, there is a Caltrans engineer in Hoopa Valley who could talk with students.
Becca – Plankton Buoyancy Model
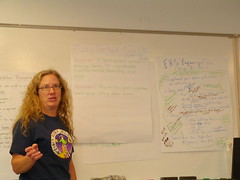
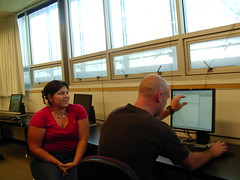
Becca discusses the different language engineers used to analyze her project.
Becca enjoyed listening to how the engineers thought about her project. Each engineer analyzed the project a little differently.
Errin – ENGR 215 Flood Project for Fortuna High School
Errin found many good engineering contacts. Engineers thought he would need permits and surveying. Errin discussed that the city is interested in the project now and so is the school… someone has to get it started. He made contacts with Caltrans engineers and Winzler and Kelly engineers.
Brooks – Engineering club – Design Your Future club at Eureka High School
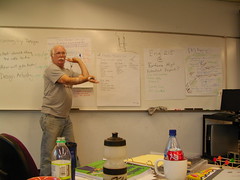
Brooks presents ideas for EHS engineering club.
Brooks thought a good question was “were you in a club in high school?” Brooks got good ideas about field trips to engineering projects. At EHS there are career paths for service learning. One possible service learning project is to teach middle school children about STEM. They could also participate in the Rube Goldberg competition.
Maggie mentioned the physics day at 6 Flags in the Bay Area. She also knew about a place to get inexpensive science kits.
Dan – Chair Design
Dan presents chair design concepts.
Dan mentioned the engineers suggested he use iterative design. They suggested that they design a prototype/practice chair. Participants suggested a smaller prototype, maybe with hot glue.
After making the practice chair, the students could then carefully design their cardboard chair. Dan is thinking to use duct tape rather than wheat paste.
Sheryl – Bike Helmet Design
Sheryl presents engineers' ideas about her bike helmet design project.
Engineers helped Sheryl think about using melons vs. eggs to do testing. They helped her think about how folks will fall off their bikes and about collision types. They suggested using films of testing and then studying them in slow motion.
There were lots of ideas asking students what makes a good helmet. Students could consider redesigning and redecorating.
Students could consider the life cycle of a helmet.
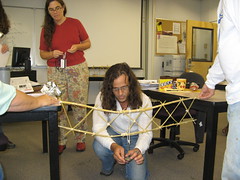
Duct tape student to wall
Sheryl uses this project to help students learn how to cooperate and to learn more about physics. Student teams often choose to tape the squirreliest child to the wall. First the student stands on a chair. Then, the teams wait to see which student stays on the wall the longest.
Ken – Regional Rube Goldberg
Ken presents regional Rube Goldberg contest ideas.
Rube Goldberg devices take a simple task and make it complicated. Ken talked about how some of the visiting engineers thought that is what engineers do!…. While others said engineers do exactly the opposite. The Engineers suggested using an open ended environmental theme.
Some logistical issues that Ken is thinking about include 1) having a presentation of the devices at the Math Festival at the mall 2) how to encourage teachers to participate, as some teachers prefer “tidy” projects. Ken thinks each team should have a door and saw horses provided. He is also developing a list of partners and sponsors including the Discovery Museum and possibly local engineering firms. DYF could be a sponsor/partner.
Ellen – Fizzy Rocket
Ellen was pleased to learn how many of the engineers she knew already.
Some ideas suggested by the engineers included having individual students develop a design idea as homework and then come to class ready to work in groups. She also has the idea of adding an opportunity to re-design (iterative design). She is thinking of having 3 to 4 person teams.
Byron focused on developing electronic curriculum that was standards based. He commented that both Julie and Lonny encouraged him to think about what the students would be able to design.
West Point Bridge Design Software
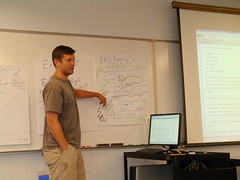
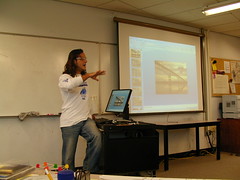
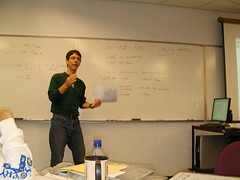
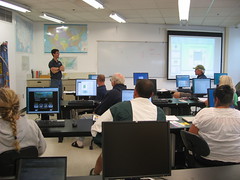
Lonny introduces free West Point bridge software
After a quick software orientation by Lonny, including an overview of criteria for an excellent bridge, participants each designed their own bridges using the free West Point bridge design software. Some participants explored creating a bridge that was a contender for the Living on the Edge” award, which explores the trade offs of cost and safety. Some people explored different bridge designs including suspension.
Errin explains to Maggie how he used the software to design a bridge.
We walked around the room and viewed everyone’s bridges and explored the idea of safety factors and risk. Risk is the probability of failure which can be related to the probability of a flood or earthquake of a certain size. We discussed that it is harder to determine the probability of a certain sized flood in our age of climate change as discussed in a Science article by Milly et al “Stationarity is Dead: Whither Water Management?”
Adopting Bridge Curriculum
Forrest, Sheryl and Byron examin Errin's bridge.
The participants then discussed how they might include the bridge curriculum in their classes. Lonny let folks know that the standards that are met by the curriculum are in the notes of the PowerPoint from yesterday.
Teaches discussed the playing the “numbers game” with STAR testing by determining who to give the test to.  Some folks are holding students accountable by how they do on the test. If they do not do well, they will be put in remedial classes. So, some students are are trying harder.
At one school, 7th graders could earn back credits by doing better on the STAR scores because there was no summer school this summer.
The Building Big straw and gumdrop hands-on exercises will be useful for 7th grade.
The pasta exercise will need to be modified as discussed yesterday to be useful.
Participants had a discussion of how important to use triangles instead squares when designing bridges.
Sheryl uses a amusement park simulation program as part of her end of the year curriculum. She gives each team the same amount of K-NEX and they design a amusement park. They can barter for parts from other teams.
One take home message is to be more explicit about the design criteria when working with students. It is important for students to learn how to work with weighted scores. We discussed the idea of working with the students and/or the client to develop criteria. We discussed the difficulty students and parents have understanding weighted averages.
Ideas of using tubes of paper to build as presented in Building Big.
We watched Ken Robinson’s presentation on how schools kill creativity on TED. We then had a discussion of the difficulty of working within the constraints of our existing educational system. We discussed how many are saying Engineering Education needs to change, including the National Academy of Engineers. We discussed the idea of a Learning Organization and how institutions need to be more willing to take risks and make mistakes, just as our students need to learn to be willing to make mistakes, as mistakes are part of being creative. We discussed the importance of risk taking and making mistakes as part of being creative. We also talked about the importance of being tenacious and being will to try again, even if it does not go so well.
Assessment
Folks completed the post assessments for engineering attitudes, teaching engineering and for static/bridge physics.
Engineering and Appropedia
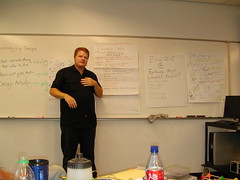
Lonny presented on appropriate technology projects that students have worked on. He also talked about Point Positive: the idea that it is time to start demonstrating what people can do, instead of castigating against what they should’t do. All of the project examples came from Appropedia – Projects.
Participants expressed interest in many of the technology engagements. Participants discussed the difficulty of maintaining a garden during the high-yielding summer months when the students are not in classes. A few participants expressed interest in doing a bicycle powered energy project.
A related site that folks may enjoy exploring the concepts of sustainable engineering is The Story of Stuff
Closing and Focus Group
Beth and Lonny thanked the participants. Brandie and Rebecca met with the participants to complete a focus group to assess the institute. Participants picked up their materials for the Save the Penguins curriculum.
Jim answered questions from the Minute Papers. We visited Skype. Jim talked to us about how a fuel cell car would work and about the importance of avoiding CO in hydrogen, as CO fouls the platinum catalyst of the PEM fuel cell. Jim did talk to us about Gibbs Free Energy. He dropped a factor of 1000. Errin helped him find his zeros on the floor!
Statics Overview for Bridge Design
Beth builds a dome from the Building Big curriculum.
Participants were encouraged to review the relevant bridge curriculum material available on the Building Big site where there are lots of quick inexpensive demonstrations. Lonny presented an overview of statics and bridges (see presentation below).  The group used simple exercises to build their understanding of statics, triangles and trusses, such as a straw rectangle vs triangle, pushing hands and pulling hands.
Discussed using Embedded Energy (aka embodied energy, aka emergy) as a criterion for bridge design.
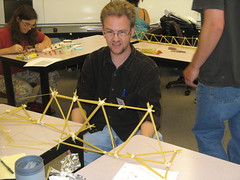
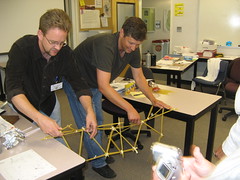
Byron worked with Brooks to develop this pasta bridge.
The hands-on activity was to build a bridge from pasta using masking tape. The project comes from Teaching Engineering Made Easy. The criteria for an excellent bridge were provided:
Safety
Aesthetics
Creativity
Length
Cost
Embedded Energy
Byron and Brooks prepare their bridge for testing.
Participants had an hour to design their bridges in groups of 3. Teachers were given 1 meter of tape and a package of pasta. Folks ended up needed more tape and time. After lunch, the bridges were judged by Lonny, Julie and Beth on the criteria listed above. The bridges were judged using this Delphi Matrix based upon the stated criteria. The bridges failed at 249g, 70g, 90g, and 180g.
In debriefing the activity, teachers suggested the following modifications;
Lonny puts weights on the bridge to test it.
Don’t use pasta because it is too frustrating. Possible substitutions are craft sticks (but they may not break soon enough) or skewers (but they maybe too strong) . Straws might work, as something is needed that breaks, but not too easily. (Should the bridge fail at a joint, or within a member?)
Consider not using masking tape. Possible substitutions are white glue, hot glue.
Consider using different materials for Compression (straw) and Tension (string).
Consider asking students to keep journals.
Change the assignment so it is shorter, uses less materials, or provide more time.
Manila Folder Bridges
Errin shows a bridge his students created last year with manila folders.
Errin presented the curriculum he used last year to teach about bridges. He described the difficulties the students had (procrastinating and patience) and the lessons they learned. Although most students waited until the last minute, most of them did finish their bridge projects and felt successful. He plans to implement the curriculum again this fall, with some changes. He plans to set more due dates for the students and require that they only build half a bridge.
Mousetrap Race Cars
Errin also uses Mousetrap race cars. Although one can buy kits online, Errin prefers to use most of his own materials. He tells the students they need to give him $5 if they want to keep their cars.
Thursday Afternoon Project
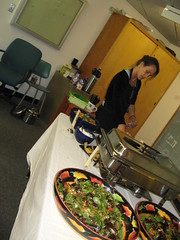
Maureen of Citrine catering presents our dinner of tamales, beans, salad and cobbler.
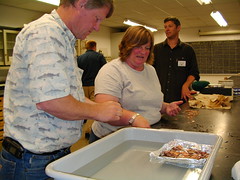
Participants then began preparing materials to present to the engineers, who would arrive at 4pm.
At 4pm, folks began to share their ideas with the engineers after a short introduction.   At 5pm, Maureen of Citrine Catering served a dinner of tamales, salad, black beans and berry tartlettes.
Mike Foget asked what were the next steps. Beth said there would be a meeting in September with folks from Project Lead the Way, professionals, and educators. James Van Bonn let Beth and Lonny know he is interested in helping with any type of problem solving. Carlos Diaz shared information about Sewer Science curriculum and equipment. He says to contact him if you have questions.
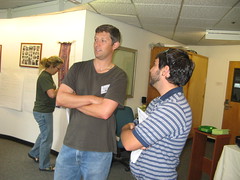
Carlos and Brooks discuss the possibility of an engineering club at EHS.
James and Sheryl think about the bike helmet project.
Michael and Becca discuss the plankton buoyancy project.
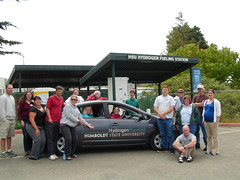
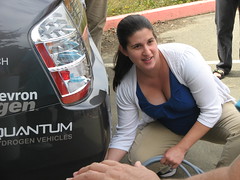
Participants at the hydrogen fueling station with the hydrogen powered car at Humboldt State University.
We started the day reviewing the blogs from Monday and Tuesday. Beth introduced some books about design, Life Cycle Analysis and team development. She encouraged people to visit the curriculum developed for Building Big which can also be found on the DYF Teacher Resources page.
Jim reviewed the questions from the Minute Papers from the day before. A bit of time was spent on explaining Gibbs Energy, which is the energy available to do for real work.
People had good ideas for demonstrating how to teach middle school children about global climate change.
Using dry ice (CO2) with pickle jars to study the impact of CO2 on plants – Sheryl
Using the students’ classroom as a model of the earth. Monitor the CO2 in the classroom and how it impacts students – Phil
CO2 and a lightbulb experiment and other hands on labs can be found at the Climate Studies Institute – need to contact Karina Junge – Ken and Becca know how to contact her.
A way to incorporate the HyTEC curriculum into life sciences is to point out that the body runs on electricity (Ken). Another way to is point out how mitochondria use hydrogen and oxygen. It is also important to convey how science is fun.
Jim suggested the following links for more info on fuel cell and hybrid vehicles and buses:
Participants moved over to Sci D 9 and worked on Lesson 5: calculating the efficiency of a fuel cell – electrolyzer system. Most people calculated 38% to 42% efficiency. The electrolyzer efficiency is about 8%. The overall efficiency of the system is about 3% due to the combination of the electrolyzer and the fuel cell efficiencies.
Ellen and Sheryl compute the efficiency of their fuel cell and electrolyzer.
One team had a fuel cell efficiency of 13 % and then via trouble shooting (realizing that hydrogen was being lost, even when the fuel cell did not have a load) they realized they had a broken valve. Participants appreciated an opportunity to trouble shoot the equipment.
Jim pointed out that commercial electrolyers have typical efficiencies of about 50-70%. The bench-top
model with the HyTEC curriculum was not designed with efficiency in mind but rather to be inexpensive and practical for lab use.
A couple teams had a hard time getting their fuel cells to start in the morning. Folks thought it was due to the membrane drying out. Once the systems were purged, they worked again. The fuel cells had been left out overnight. Folks were encouraged to store the fuel cells in a bag to keep them moist.
Hydrogen Fueling Station Visit
Andrea inserting the data cable to determine pressure and temperature of the fuel tank.
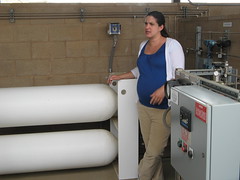
The hydrogen fueling station has a CA standard data cable to measure pressure and temp of tank before fueling. The station fills cars to 5000 psi. There are two large storage tanks at the station that each hold 6kg of hydrogen.
Hydrogen comes from an electrolyzer is about 50% efficiency. It takes about 18 hours to generate hydrogen to fill the storage tanks after filling the tank on the fuel cell car.
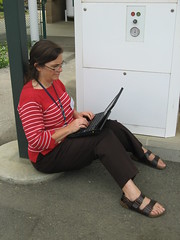
Beth blogging during the visit to the hydrogen fueling station.
Part of Andrea’s masters thesis examines the efficiency of the compressor. She has learned that it is about 10% efficient which is very different than what is commonly used for estimates. The low efficiency mostly due to
the compressor’s grossly oversized electric motor. Motors are typically quite efficient except when they are drastically oversized (and thereby underloaded).
Andrea showing the storage tanks and compressor.
The electrolyzer at the HSU fueling station is about 50% efficient. But Andrea has found that the  electrolyzer is not that efficient which is likely due to the ac-dc converter that it requires. There is a 7KW load for the electrolyzer that could not likely be met by PV panels on the roof of the fueling station because there is not enough roof area.
We had a discussion about why most folks do not care about efficiency of electrolyzers and compressors as much as they care about reliability and cost.
The HSU hydrogen station cost $678K to construct, including $253K for major equipment, $133K for balance of system, and $220K for labor. Jim notes that a larger station would likely experience economy of scale.
On average the station uses about 100 kWh of electricity per kilogram of hydrogen produced (this accounts for the electrolyzer and compressor energy consumption, which is the majority of the energy demand). This means that we would use about 36 kWh/day to support our one hydrogen Prius driving 100 mi/week (Note: For comparison the average home in the US uses about 30 kWh/day, and the average CA household uses about 15 kWh/day. Jim knows households who, with reasonable effort, have gotten this number down to about 5 kWh/day.)  If we covered the HSU hydrogen fueling station awnings with solar electric modules we could generate about 15 kWh/day, or 41% of the energy needs to run the car 100 mi/wk.  It will not be possible to construct commercial scale hydrogen fueling stations that serve large quantities of cars and expect them to generate all of their power on-site using solar energy.
We then visited the Environmental Resources Engineering department office and discussed the automatic lighting system.
Design a fuel cell activity
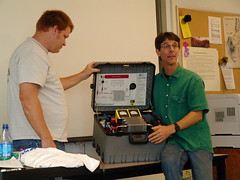
Dan examines the Stack-In-The-Box (SIB) as part of the fuel cell system design acitvity.
Participants returned to Science D 17 to design a fuel cell power system. Participants answered questions such as
What are important design criteria and constraints?
What electrical load do we need to power or how much electrical power do we need to provide?
What are two ways to increase fuel cell power output?
Connect voltage by increasing number of cells in series
Increase the current by increasing the size of individual cells
Minute Paper
Most Important Thing Learned
How a fuel cell works and current practical uses for hydrogen.
Evaluating the work of a fule cell and its practical application.
The design the fuel cell project put everything into perspective.(2)
Hydrogen fuel has some issues to work out to mak it widely available.
Seeing the hydrogen car and the station details.
How to calculate efficiency.
Performing activities in the lab before implementation in the classroom.
More practice with the fuel cell.
Lonny observes during fuel cell system design activity.
Remaining Questions
What do I need to use Skype? What do I need to use USTREAM?
How does the car work from start to running? I know how the fuel cell works, but its working within the car…. I’m unclear.
Are there sensors to determine the purity of H2 and O2 gas produced or some other way of determining “how much” etc?
I am OK on Gibbs.
Feedback
I have a limited familiarity with electricity. Could there be more materials to be used with the design activity such as a PowerPoint? Also, integrating similar calculations (using different units) before students are expected to synthesize ….
Demos of labs and fuel cells could be created and podcasted or recorded and made available.
Another great day. I can tell Jim loves his work. THANKS!
HyTEC stuff could be prepared for lower grades as ready to go curriculum to reach more students.
Please 3-hole punch handouts. I have misplaced several of mine.
Again, interesting, fun, activities. Thanks for answering all our questions! It’s because we are very interested. We loved it! Could you bring a calendar in so we can sign up for you to come out to our school?
Great job. Really liked the reality of using hydrogen.
First hour talking about Minute Papers from the previous day. Our topics included Thursday project ideas, the limits of mathematics education, and clarification on the design process.
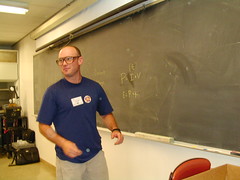
Our instructors Right to Left: Jim, Andrea and James
We moved to Science D 9 and Ellen introduced participants to Jim and Andrea. Later James joined to help teach as well.
Jim presented overview of HyTech Curriculum along with ideas of how to purchase more KOH solution. He showed a short “teaser” video.
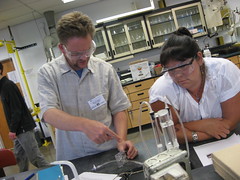
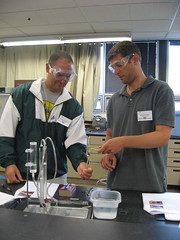
Andrea Allen introduced Activity 2, which was learning how to set up the electrolizer. Participants made hydrogen and oxygen. The participants ignited the hydrogen and oxygen! The hydrogen made a nice pop. The oxygen was harder to ignite. Participants asked for bigger test tubes for the oxygen. People discussed using longer matches vs longer sticks.
Erin calculates the efficiency and drops a factor of 10.
Jim finds a zero on the floor... Errin must have dropped it!
After lunch, participants learned how to use the hydrogen they generated to run their fuel cell in Activity 3. Participants calculated efficiencies. Errin dropped a zero when calculating the efficiency… it was found on the floor –
Â
After the afternoon break participants moved to Science D computer lab and learned fuel cell electro chemistry in Activity 4. They reviewed the Lewis Dot diagram for H2O, balanced the related chemical equations,  viewed online simulations (1)(2), used the physical model included in the HyTEC curriculum and touched actual pieces of PEM fuel cell.
Jim teaching electro chemistry in Science D computer lab.
 In the reflecting on how the curriculum could be used in the classroom, particpants brought up the following issues:
Folks discussed the use of the standards as well as the STAR CST Blueprints.
Folks also discussed that the time after STAR testing is a time when interesting and useful activities that are not directly related to the standards can be presented.
How to make renewable important to students in Hoopa?
Some have asked why burn something you can run out of, which will also help you make plastic heart valves?
The DYF institute started by introducing the facilitators (Beth Eschenbach, Lonny Grafman, Jim Zoellick, Andrea Allen, Erin Cearley and Steven Medina). Julie Van Sickle, Redwood Science Project Co-Director was introduced, along with Brandie Wilson, DYF Institute II Assessment Leader.
Brandie then administered the Engineering Attitudes assessment tool from Dr. Christine Schnittka as well as the DYF Pre/Post Assessment.
Beth then presented an overview of why it is important to teach engineering to K-12 students.  We also discussed misconceptions and constructivism.
Participants played the Name Game by learning each others’ names and favorite hobby. Participants had the following expectations:
Engineering Design Process Knowledge
Ideas for
Making Design an amusement park more engineering
Design of playground project
Inspiring students that can be used tomorrow – tomorrows activities today
to push students
to keep children’s interest
Prepare for ENGR 215
At Fortuna
At  KRECR
Collegiality and sharing of perspectives to find new ones.
Ideas for
After school club ideas
Projects for Physics, physical science, earth science and Chemistry
Deeper understanding of opportunities for engineering education in K-12
Have fun
Participants were reminded of the concept of buoyancy and then worked in groups to design and build a vessel that will hold the highest number of pennies.
After wards, participants discussed extensions of buoyancy:
Use marbles or weights, less expensive and easier to dry – Ken and Sheryl
Assessment is give students rubber duck and water to determine weight of duck – Ken
Have students determine how many balloons required to lift themselves – Ken
Plankton buoyancy project with film canisters – Becca
Maggie and Sheryl design their vessel.
Ken and Becca design a foil boat that holds more than 250 pennies.
After our break Lonny led a conversation on the difference between the Scientific Process and the Design Process.
We then discussed what teachers might do for the Thursday project. Teachers will meet on Thursday with professional engineers to brainstorm on how to include more engineering concepts into their curriculum.
Participants had these questions.
What are specifications?
How to improve blog so all can download files from it?
Curricular areas of interest for the Thursday project include:
Graphing
Trig functions
3-D Pythagorean Theorem
The Invention of Air – good book on science misconceptions.
After lunch, Steven administered the heat transfer pre-assessment for the Save the Penguins Curriculum.
Beth then presented the Save the Penguins curriculum, which is one of the Engineering Teaching Kits (see bottom of this linked page) developed at University of Virginia by Larry Richards and his students. Christine Schnittka adapted the Save the Penguins curriculum to include targeted demonstrations (wooden and metal tray, wrapped cans of soda, silver and plastic spoons and the hot house) to address common heat transfer misconceptions (Albert, 1978; Clough & Driver, 1985; Erickson, 1979; Erickson, 1980).
Cold is a substance that moves
Heat is a substance that rises
Heat is a substance like a fluid, made of particles
Larger ice cubes are colder than small ones
Metal is cold, plastic and wood are warm
Aluminum foil traps “coldnessâ€; metals hold “coldâ€
Sweaters warm things
Participants experienced the Save the Penguin curriculum by designing and building an igloo to protect an ice cube penguin from the over 140 degree Fahrenheit hot box.
Errin examines his igloo.
Weighing the igloo before putting the ice pengin in.
Participants weighed their devices before putting in their penguins and then determined the weight of the ice cube penguin before putting it in the hot box.
After 15 minutes, the penguin ice cubes were weighed.
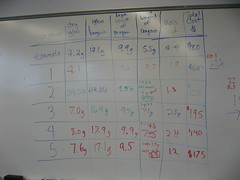
Data summary of 5 groups.
Maggie and Erin’s ice cube lost the least amount of mass.
The group then had a discussion about Steven Chu’s Comment for White Roofs and Streets. The group watched Jon Stewart’s Interview of Steven Chu and the followed up by reading Arthur H. Rosenfeld’s explanation why white roofs and roads are a good idea for dealing with global climate change.
Participants reflected on teamwork in their classes. Some of the ways others foster team work in their classes:
Current, personal life examples of teamwork – Lonny
Minute Paper
Most Important thing learned
Similarities and differences between Scientific Method and the Engineering Design Process was important so I can use it in my curriculum.
Easy and inexpensive lessons I can use tomorrow!
Aluminum is not the best material for boat building!
What engineering design is: objectives, constraints and criteria (2).
Receiving “Teaching Engineering Made Easy”.
Meeting new people.
Mini-heat transfer ideas that will work stand alone or in series as is.
How to save an ice penguin with the fewest resource.
Remaining Questions
Which steps in the design process are critical to do for students to gain an understanding of engineering? – Today I heard a lot of “you could cut this step out”.
What projects are people thinking about?
Contrast engineering design with engineering and how this difference relates to the ‘deal” and attitudes about engineering from students.
Engineering concepts for life science – I build models, but not following the “design process”.
What is expected for the Thursday project?
Feedback
Fun and Interesting and I love and appreciated the stuff you gave us!
Great first day! Excited to learn more!
It was enjoyable. Did not seem like 9 hours. You filled the time well.
Very good day – enjoyed the info and activities.
I felt a little lazy today. Last year we really pushed hard :-).
I like the resources and curriculum.
•Cold is a substance that moves
•Heat is a substance that rises
•Heat is a substance like a fluid, made of particles
•Larger ice cubes are colder than small ones
•Metal is cold, plastic and wood are warm
•Aluminum foil traps “coldnessâ€; metals hold “coldâ€
The second DYF Teacher Institute follow up occurred on May 9, 2009 from 8am- 4pm at Humboldt State University. Links to the materials provided at the institute are available below.
Four DYF teachers attended Ellen Osten, Maggie Peter, Rebecca Schuler and Ken Pinkerton. The instructors were Lonny Grafman and Beth Eschenbach of the Environmental Resources Engineering at HSU.
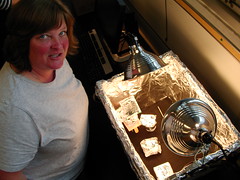
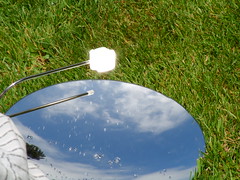
In the morning Beth Eschenbach provided an overview of the day. The DYF teachers completed a pre-assessment. Lonny Grafman then provide an introduction to parabolic solar cookers. (Parabolic Solar Cookers (pptx)) The teachers were then provided materials (cardboard, duct tape, utility straps, aluminum foil and box cutters) and given 1.5 hours to create a parabolic solar cookers.
The ovens were tested outside using vegan marshmallows. All ovens produced warm marshmallows!
After lunch, participants were re-acquainted with the Pasco Micro Hydro set up presented in the previous Follow Up. Teachers worked in pairs to build their own set up. One team of teachers designed a set of experiments to explore the impact of flow on power production and the other team designed experiments for exploring the impact of head on power production.
Teachers then presented their experiments and results to the other team.
DYF Teachers Ellen Osten, Maggie Peter, Rebecca Schuler and Errin Odell work with Instructor Lonny Grafman to size a micro hydro system.
Overview
The first DYF Teacher Institute follow up occurred on May 2, 2009 from 8am- 4pm at Humboldt State University. Links to the materials provided at the institute are available below.
Five DYF teachers attended Ellen Osten, Maggie Peter, Rebecca Schuler, Errin Odell and Forrest Stamper. The instructors were Lonny Grafman and Beth Eschenbach of the Environmental Resources Engineering at HSU.
In the morning Beth Eschenbach reviewed the importance of increasing the number of students interested in studying STEM (Science Technology Engineering and Mathematics). Forrest Stamper and Beth Eschenbach rreflected on the successes and challenges of teaching ENGR 215 Introduction to Design at Hoopa Valley High School. (Efforts to Increase STEM in California and ENGR 215 at Hoopa Valley High School ). Other DYF teachers reported on how their teaching had changed since the DYF institute last summer. For instance, Maggie Peters brought her basket work and discussed how she teaches math, science and engineering in a culturally relevant way at Hoopa Valley Elementary School. Errin Odell shared his experiences with building bridges with manilla envelopes and using the West Point Bridge Software at Fortuna Union High School.
After reporting out, the DYF teachers completed a pre-assessment.
After the assessment, Lonny Grafman provided background information on micro hydro design, physics and math. (Microhydro basics ). The teachers learned how to use the equation below .
After lunch Lonny Grafman led the participants into the HSU forest along Jacoby Creek. The teacher participants learned how to determine the potential head in a hydro system, using simple tools such as a measureing tape, a 5 foot pipe and a level.
Ellen Osten and Errin Odell calculate head loss due to pipe friction.
After returning the the lab, the teachers discussed how they could use this lab in their own classrooms and completed a post assessment. Each participant went home with a set of materials so they could complete the lab with approximately 24 students.
Micro Hydro Field Lab Equipment Provided to Teachers (need a picture)
3 4-gallon buckets
3 stop watches (timers)
floaters (orange peels)
3 meter sticks
3Â levels
3 open reel tape measures (100 ft)
1- 1/2″ Schedule 40 PVC pipe
1 – 1″ Schedule 40 PVC pipe
1 – 1 1/2″ Schedule 40 PVC pipe
1 – set of 1/2″ fittings (90, 45, T, ball gate valve, quick release, couple, check valve)